
 Sign In

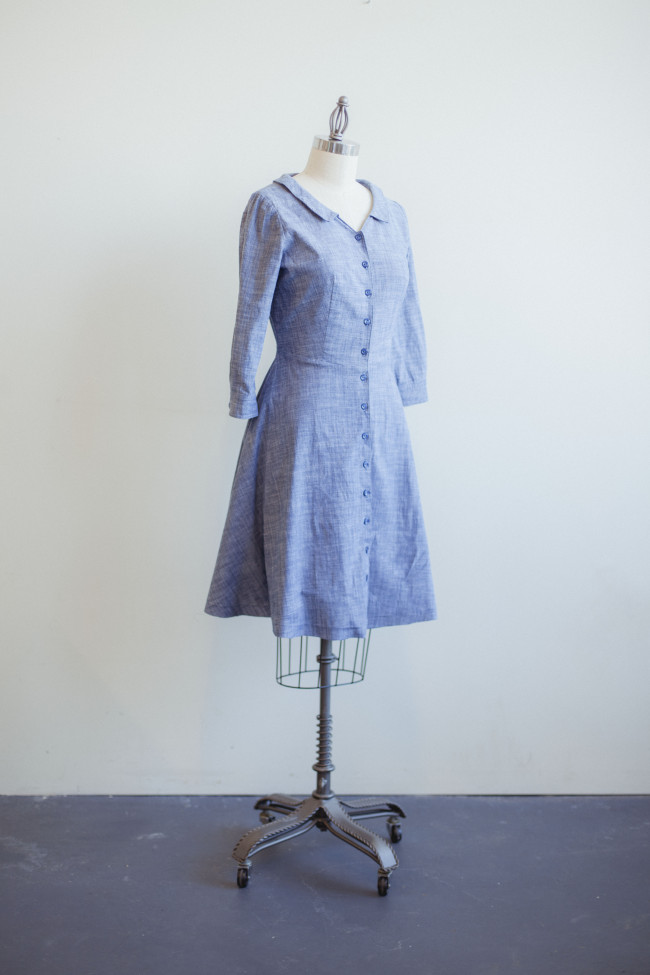
How to get a level hem
Have you ever put together a garment – whether it’s a dress, a skirt, pants, or a blouse – only to notice afterwards that the hem seems to be drooping in certain areas?
It’s not necessarily the fault of the pattern. There are a few reasons you might experience this, but it’s an easy one to fix if you just follow a few simple steps every time you hem.
Why hems droop
There are two main reasons you’ll get an uneven hem:
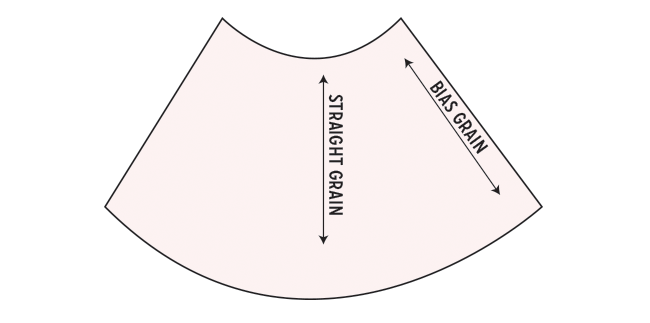
1. The grainline.
Unless you’re making a skirt out of a rectangle, chances are that your hem falls on different grainlines. The center front might be cut on the lengthwise grain, but the side seam is on the bias (that is, a diagonal grain).
As you might know, fabric tends to stretch along the bias. As the skirt hangs, this seam stretches a bit and starts getting longer and longer.
Full skirts tend to exhibit this issue more than straight skirts, because the angle of the bias seam is more severe.
2. The body
Another reason you might see an uneven hem simply has to do with the curves of the body.
The fabric must form around the curves before reaching the hem. If, for example, the person wearing the garment has a bit of a booty, more fabric is required to cover that curve. Otherwise, you wind up with a hem that rides up in back.
How to level a hem
You should level your hem every time you make a garment, before actually doing any hemming. Here’s how.
1) Hang the garment
Hang the garment up for at least 24 hours.
This gives your fabric a chance to relax and stretch. The bias grain will stretch out overnight and you’ll have a better sense of what the fabric will look like when it’s worn.
This step is much more important if you are sewing a full hem. As I explained earlier, full hems will have more area cut on the bias while straight, narrow hems will be cut closer to the straight grain and are less prone to stretching.
2) Put the garment on
If you have a dress form that you use, put the garment on that. If not, put the garment on yourself and try to get a friend to help out.
Be sure to wear the type of shoes you plan to wear with it, so you have a better sense of the appearance of the hemline. If you are using a dress form, adjust it to the height you are with these shoes.
If you’d like, you can put the dress form on something high, like a table, to avoid crawling around on the floor.
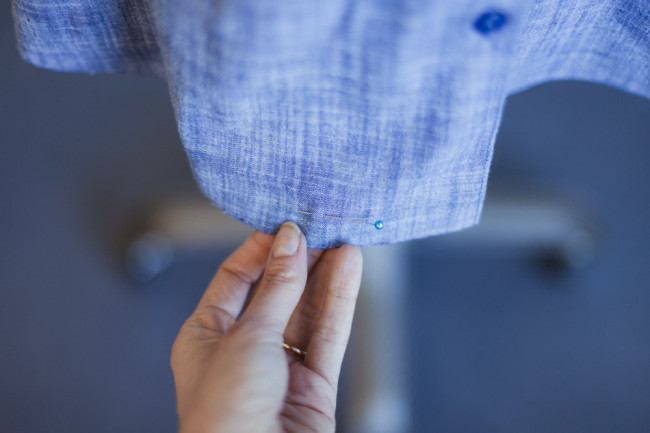
3) Mark the length
Mark your desired length with a pin. I like to do this along a side seam, but you can also do it at the center front or anywhere else that makes sense.
If you have a skirt length that you know is flattering on you, use it! Measure that length from the natural waist and mark it on the skirt. You could get this measurement from a similar garment you have that you already like the look of. Or, put on the garment and adjust the hem to your preference.
Add hem allowance. This is the amount your hem will be turned under.
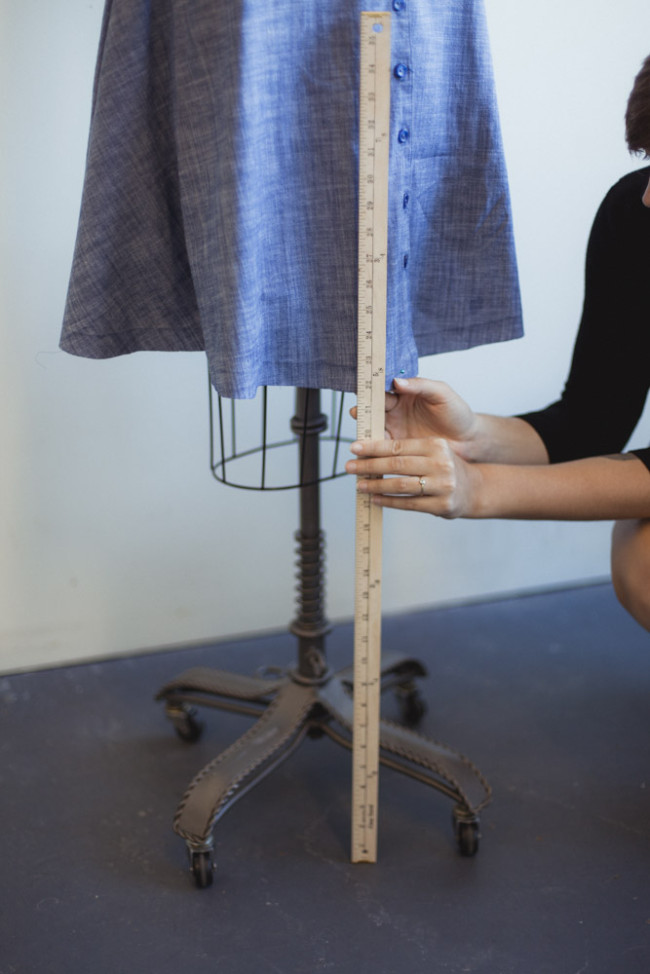
4) Meausure from the floor
Measure the distance from the floor to your pin.
I like to use a yardstick (or metre stick for those of you in civilized cultures) to measure this distance. You can also use a tape measure, but a yardstick makes it easier to measure at 90 degrees to the floor.
Measure this same distance all the way around the hem and mark, either with pins or chalk.
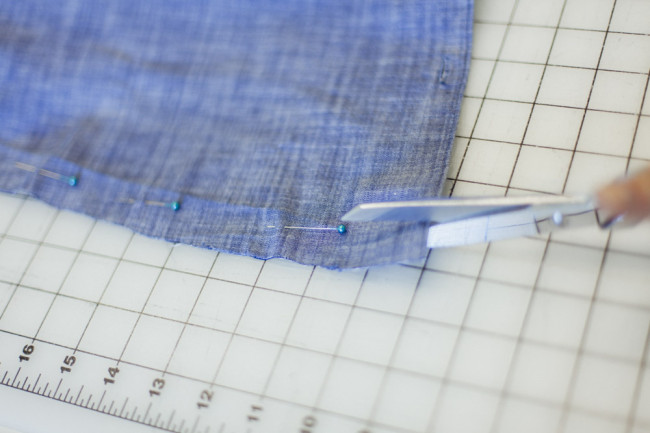
5) Trim.
Now you are ready to trim off any excess fabric. Use the pins as a guideline to cut around the hem.
You are now ready to finish that raw edge and move on to the next step of hemming. Congratulations on that straight hem!
Tell me: How and when did you learn the importance of leveling out your hems?


Comments
Isaboe Renoir
September 2, 2014 #
One of my earliest memories (I was about 3-5 yrs old) of buying a fancy dress includes going up to the alterations floor in a fancy department store and standing in front of the big mirror while a lady knelt down and pinned up my skirt all around to make the hem even. And since I was so young they left all the extra hem allowance on so it could be lowered as I grew.
Once I was older and on my own I realized I couldn’t buy most skirts because my hem was almost 3 inches in difference from front to back (but otherwise it’s nice having a derriere….) But now of course I sew my own and just like the alterations lady, I hem my skirts from the floor up!
Rebecca
September 2, 2014 #
Great info. I’m such a sewing nerd I couldn’t wait for Sept-Hem-ber! Thank you!
Anna-Carin
September 2, 2014 #
Good tutorial! In step 5 you say “use the pins as a guideline [to cut around the hem]” – I was actually taught to align the markings into a smooth line as a separate step (4.5?), which emphasizes its importance. Especially if you to mark it on yourself with a hem chalk marker (which is great as it allows for posture and booty more accurately than a dress form) it sometimes takes a lot of adjusting to chalk lines that are pointing in every direction, and on a full skirt they might disagree by an inch or more on where the hem should be.
Tialys
September 2, 2014 #
My problem is I live in a very old house and there isn’t a level floor anywhere!
kc
September 2, 2014 #
If your floor isn’t level, would it help to keep the yardstick in one place and turn to meet the marker? At least that way the yardstick would always be measuring the same distance wherever it measured on your skirt.
Regarding other methods of leveling a hem for the solo-dwellers without a dress form (or a stand for a dress form, which is my problem), I recently used this tip from a vintage sewing book: You get two chairs of the same height (dining room chairs are great for this), place them with about 2-3 feet between them, and tie a chalked piece of string from one chair to the other at the top of the leg or near the seat of the chair. The chalk will mark your garment when you stand next to the string and let your skirt fall against it. This gives you a fantastic guideline about what ‘level’ is, and you can use the chalk marks to measure a cut-line based on where you want your hem to fall.
Alice Elliot
September 2, 2014 #
Just the best tip!!!!
tucsoncarol
September 2, 2014 #
There also are old (and very hard to find) puff bulb measures. I’m sure they have a name, I just don’t know it. They consist of a rubber bulb with a pouch of chalk on a measure stick that stands on the floor. You measure up, move the bulb into position and as you turn, you puff a chalk mark onto your dress at your preferred height. I have even seen some dress forms with a type of this on the stand itself. My mother had one and used it all the time for her dresses (more reliable than children with pins).
tucsoncarol
September 2, 2014 #
Looks like I’ve looked in the wrong places. I just looked for them on Amazon and they are there.
kc
September 3, 2014 #
I have one of those that I found at a thrift store! Unfortunately, it just never seems to work that great for me — the yardstick part doesn’t tighten as well as it should, so it sort of marks a spiral for the hemline. =)
Perhaps I should check out Amazon for a functioning version. Not having to measure down or up from the string chalkline will certainly save a step!
MARGARET
September 10, 2014 #
I have an old puff-marker, but I noticed recently that the tailor-supply catalogue Wawak is selling them! ( wawak.com)
sj kurtz
September 2, 2014 #
Stand on a unlevel floor?
No, really, I do a temporary hem for the full skirts, as they will continue to dip and dive as time goes on past 24 hours. I have weighted the fabric first, sew side seams up towards the waist, down to the floor, and no matter: eventually that hem will change. The chalk line on the chairs is a great idea: nice adaptation!
cyngehin@gmail.com
September 2, 2014 #
Spent many minutes standing on my Grandmother’s formica kitchen table while she measured up from the table top to the desired length. Turning under and re-checking followed. She would also let garments hang for a day or two before the hemming process. She was quite a short lady and I think it was easier for her to reach and see the process if we stood on the table. I liked it because I felt so important and knew something new was being made for me!
Jane
September 2, 2014 #
Fantastic info. It’s great to have it all in one place.
melissa evans
September 2, 2014 #
I havent ever had trouble with stretching hem lines, so I’ve not taken this care to finish one this way. Im going to sew my first knit dress soon and think I’ll need this for that project.
Dianne
September 2, 2014 #
Thank you for this. Now, if you will excuse me, I have about five dresses to them in my UFO pile!
WowCarol
September 2, 2014 #
Thanks so much for this free series. It falls into the “Teach a man to fish…” category by giving everyone a range of options and helping sewists make informed, creative choices.
Daya
September 2, 2014 #
I would measure from the ground up all the way around. This method of only measuring at side seams may not work well for more curvy women. We may have a hemline that rises in some places due to the lovely lady humps.
Sarai
September 2, 2014 #
Daya, is this in response to the post? The post does say to measure all the way around, but you just start at a side seam with the first pin.
Alice Elliot
September 2, 2014 #
I’ve had this problem with purchased dresses and skirts. But in this case, you have to go with the shortest length as your guide and even it out all around. You might have to take out some of the hem as well. I wish they’d just leave the hems out of dresses and skirts to allow us to get them done or do them ourselves!
Cynthia
September 2, 2014 #
Sarai, many thanks for such a helpful series. I have a question I think similar to what Daya is referencing. For those of us who have an “ample rear,” should a smidge more length be added to the back hem to accommodate the fabric that will be lifted by the curve of your rear? Thanks.
Sarai
September 2, 2014 #
In effect, that is what will happen if you measure from the floor while wearing the dress/skirt. It will end up a little longer in the back, because it’s conforming around your shape.
Molly
September 2, 2014 #
My grandmother made all my dresses for me as a child and she always hung them up for a day after they were finished to let the fabric relax and stretch. Then she would have me put on the dress and she would measure the hem–all just as you describe here. But, she had a great dressmakers tool that was a ruler on a stand with a “clapper” that would hold the fabric while she put the pins in. A friend of mine the other day used a puff of chalk (attached to a ruler on a stand) that marked the hem line while I tried on a dress.
sonia
September 3, 2014 #
Thank you. That clarifies (demistifies) leveling hems for me (plus some great tips in the above comments). I add in back length and also a little width at the back of skirts for curves, and am a little obsessed with creating a good hem line by perfecting this alone. Now I see the full value of leveling the hem, it will now be an additional tool.
Sarah Ford
September 3, 2014 #
I too use the ‘chalk and string method’ as mentioned in another comment. I tape the string to a doorframe at the height from the floor that I want the skirt to be, mark the skirt by leaning against the chalked string and then adding the hem allowance. An ideal solution to hemming ‘sew’lo!
kc
September 3, 2014 #
Even better than the chairs, because the door frame won’t scoot across the floor when you’re trying to rub your skirt against it. Great idea!
Susan
September 3, 2014 #
Wow, does this bring back memories. I used to have to stand for hours (okay maybe it was only a few minutes but it felt like HOURS, while my mother did this for the clothes she sewed for me.) I HATED it. Now, things come full circle. I have to bribe, berate, beg my daughter to stand still while I do this with her clothes. Funny how things you hated as a child come back to haunt you as you force the same thing on your child. You would think I was sticking pins in her rather than in the hem of her new skirt or dress. Thanks for the memories!
Amy
September 11, 2014 #
This brings back memories. My mother used to hem skirts too, but with a skirt marker as other commenters have mentioned. It even had a place to put the the pins through. If you’re doing a lot of hem marking, it seems like it would go faster, easier, and more accurate with one of these babies:
http://www.amazon.com/WAWAK%C2%AE-Skirt-Marker/dp/B00A3UUC8C/ref=sr_1_1?ie=UTF8&qid=1410455754&sr=8-1&keywords=skirt+marker
rather a yardstick.
And, also as a little plug for English measurements, fractional based measurement (rather than decimal as in metric) is not all that uncivilized. *grin* It might even faster and easier once you’re used to the system. Metric absolutely excels in scientific measurement, which is designed for. I haven’t yet been convinced yet that for normal everyday tasks (such as hem sewing) that thinking in decimals is the way to go. ;)