
 Sign In

How to clean finish a waistband without hand stitching
Let me be honest with you. I do not enjoy hand stitching.
Wait, let me qualify that. I like it just fine in the right context. Stitching things by hand can be soothing, just like any other form of hand needlework. There’s nothing wrong with sitting in front of my laptop with the latest season of Sherlock, a cup of tea, and a bit of hand sewing. Occasionally.
The issue for me is that hand stitching often comes at the tail end of a sewing project. You need to hem something, or attach something, or hide a seam.
By that point, I’m usually ready to be done. I’ve worked hard putting the thing together and having to do some laborious last step in order to wear it is just a little bit crazy-making.
So it was with my modified Lonsdale. The bodice on this pattern is self lined, and one of the last steps is to slipstitch the lining to the bodice at the waist. I was kinda-sorta dreading it.
And then I stumbled on a way to do it by machine, using my trusty Bernina #5 foot.
What’s the slipstitch for?
First, let’s talk about the slipstitch.
Slipstitching by hand is fairly common in home sewing. The slipstitch is a way to invisibly sew a fold in place, like a hem or the edge of a waistband. It’s called a slipstitch because you literally slip the needle in and out of the fold of the fabric to hide most of the thread. It’s designed to secure something down while leaving very little evidence.
Like all hand sewing, it’s not fast. And not all things need to be fast.
I tend to think that the ability to do things the slow way is actually an advantage home sewing has over factory made ready-to-wear. Sometimes the slow way produces the best result. Slipstitching can create beautiful results.
But I also think sewing should ultimately be enjoyable for you. If you’re in the mood for hand sewing, go to town. If not, there’s nothing wrong with trying an alternative.
Back to the slipstitch. There really is no way to do it by machine, because it requires the dexterity of real human hands. The result is a fold of fabric that’s held in place, with almost no evidence of stitching on the outside.
But as I was sewing my Lonsdale, I realized that I sew invisibly by machine all the time. I do it every time I create my favorite type of hem, the blind hem.
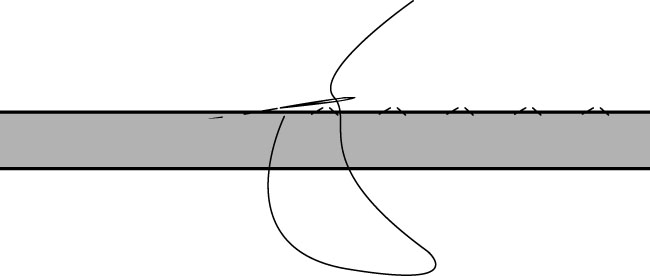
If you’re not familiar with a blind hem, it’s a type of hem that is sewn so that the stitching is almost invisible from the outside. Sound familiar?
It’s folded in a special way, and the sewing machine uses a blind hem stitch and blind hem foot. The stitch just barely bites into the fabric, creating tiny stitches that are spaced far apart. They’re very hard to see on fabric that isn’t perfectly smooth.
If you aren’t familiar with how a blind hem is sewn, visit our previous post on how to sew the bind hem to understand the mechanics of it.
I thought, if I can use a blind stitch on hems, why not a waistband?
And what do you know? It worked.
The Bernina #5 foot is my jam
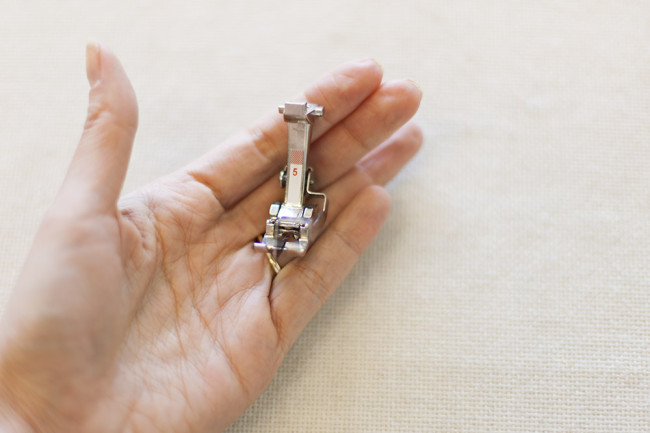
Let me take a moment to praise the #5 foot, because this is the foot that convinced me that the money I’d spent on my Bernina was well worth it.
I talked a little about this foot before in my post on my 3 favorite presser feet, and it remains the foot that impresses me the most.
This is mostly because I’ve found working with other presser feet to be a little troublesome and fiddly. The Bernina foot is engineered so well, I never skip a stitch, even in a bulky seam or hem.
Of course, this is a general technique you can do with any blind hem foot, but the Bernina just makes it really easy.
How to blind stitch a waistband by machine
This is my inner bodice before stitching. The pattern instructions have you hand slipstitching that fold in place along the waistband seam, so that the stitches won’t be visible from the outside of the garment.
You can use this if your pattern tells you to hand slipstitch, or even if it says to “stitch in the ditch” on the outside and catch the under side (which isn’t always easy).

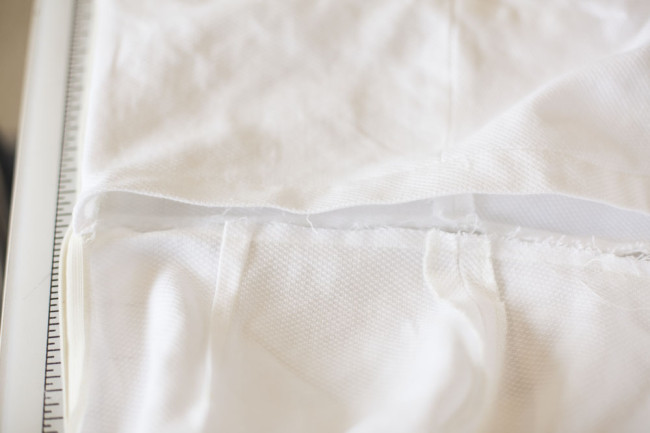
1) On the wrong side, pinch the waistband seam to create a fold. The stitching of the seam should be right at the center of the fold.
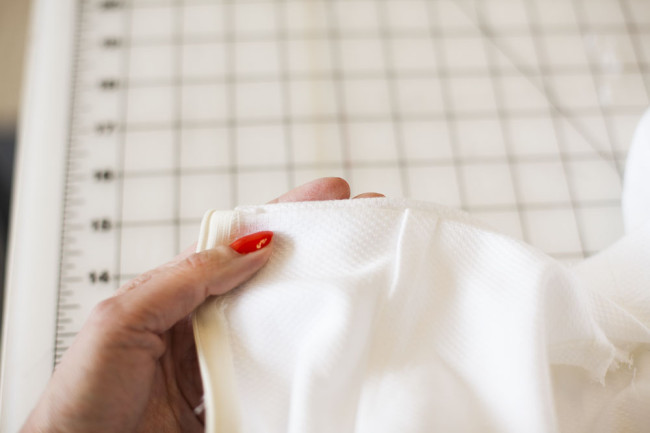
2) Place this fold on top of the lining edge you are stitching down. Place it on the wrong side of the lining edge, and allow the lining to peek out slightly, about 1/4″.
So in the photo above, the fold that I pinched is on top, and the folded-under edge that I want to secure is on the bottom and sticking out a little.
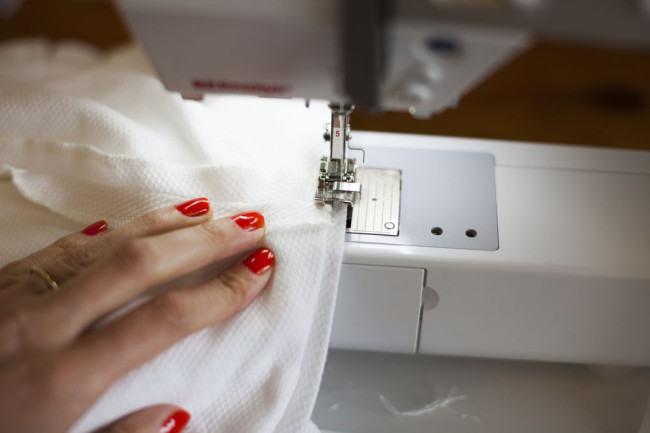
3) Using a blind hem foot (#5 foot for Bernina users) and the blind stitch on your machine, begin stitching along the lining, allowing the needle to take tiny bites into the waistband fold as you stitch. This is exactly the same as sewing a blind hem.
You may not be able to stitch all the way into the very corners, but you can get really close. And since the blind stitch has securing stitches that are spaced far apart anyway, it makes no difference in the end. If it really bugs you, you could add a few hand stitches there.
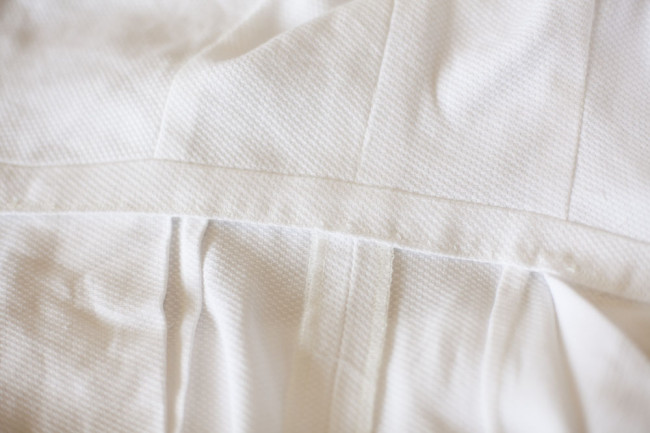
Here’s what the newly blind stitched lining looks like on the inside of the garment. Note that the stitching is not invisible on the inside of the garment. For total invisibility, you really are better off doing it by hand. But the stitching is neat and tidy and not at all obvious.
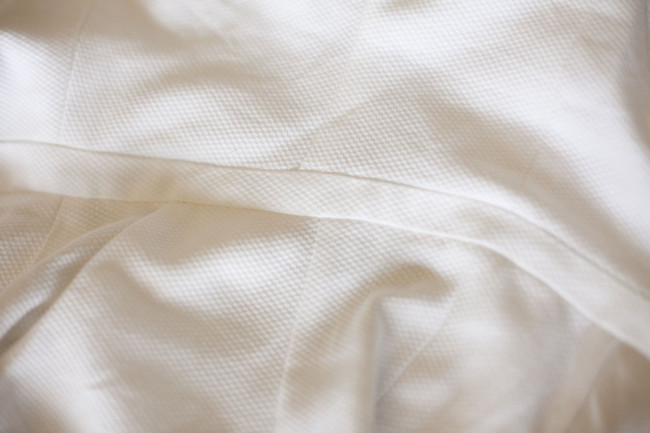
Here’s what it looks on the outside of the garment. Pretty much invisible on this textured fabric.
Conclusion
If you hate hand sewing, or just hate doing it at the end of a project, this technique gives you an easy out.
By using a blind hem foot, you’ll have a tidy, secure, clean finish on the inside and almost no evidence of stitching on the outside.
Bookmark this (or pin it, as one does these days, I think) and try it on your next waistband! And don’t forget to check out the blind hem tutorial for a refresher if you need it, and the video on the Bernina blog for more on the #5 blind hem foot.
This post was written in partnership with Bernina, who I’m a dedicated customer and fan of. Be sure to check out their blog WeAllSew if you want to learn more about their awesome feet, attachments, and machines.
Comments
Lucinda
August 6, 2014 #
How nifty! Oh man, I can’t wait to give this a try – I hate hand-sewing at the end of a project, especially waistbands. That #5 foot for my Bernina is my favorite, too!
sewing princess
August 6, 2014 #
I love my #5 foot however I found it´s never totally invisible on the outside. Probably on a textured fabric as yours you won´t notice it but I am not sure it will work in other cases. Though I am not keen on hand-stitching I prefer to do that than spoiling a project with visible thread.
Sarai
August 6, 2014 #
You could always try it and see. Because you’re stitching right into the seamline on the waist, it’s pretty hard to see the stitches (much like stitching in the ditch). I wouldn’t do it on a fabric that really shows stitches though, like satin.
sj kurtz
August 6, 2014 #
If you practice with a chunk of the same fabric/lining, you can come damn close to invisible. That might seem like a large extra step to take, but my handsewing finishing is always awful, and if I mess up, unpicking machine stitching is easier/less personal fail than the other. If you love handsewing, you are probably good at it. If you don’t, I am for you!
Like so much in life, go slow.
Stop frequently. Get something to drink. It’s warm in here, isn’t it?
Alice Elliot
August 6, 2014 #
What a great idea! I have to try it. Been using this foot for a long time with my old Bernina, but this is a new concept. Woo-hoo!
Kelly
August 6, 2014 #
Great tutorial. I also like the blindhem tutorial also. Must try!
JetSetSewing
August 6, 2014 #
That’s very clever! I’m also a Bernina partner and fan, so I’ll have to try that with my trusty #5 foot and my beloved B560 named “Karl.”
Hannah Smith
August 8, 2014 #
This has just blown my mind! I can’t believe I have never come across this before. Thank you so much – Can’t wait to try it :D
Onni Stockholm
August 9, 2014 #
I love the tips on your website, I’ve just started my own blog as a (very) amateur sewer and I’ll definitely be using your advice on my next projects.
xx
Traleyc
August 15, 2014 #
I too have just discovered the wonders of the blind hem foot. It has lay in my accessories box, unused, for 20 years. In an attempt to avoid hand stitching the hem of trousers I had shortened I gave it a try. Wow what an amazing little thing it is.
Brigid
August 19, 2014 #
So glad to see this. I am looking for more and more ways to avoid hand sewing. I have arthritis in one thumb which is very painful and is aggravated by hand sewing. I was afraid I’d have to give up sewing–I’ve already had to say goodbye to crochet and embroidery–but so far I am finding more and more ways to do just about everything on the machine.