
 Sign In

Fine Tucks Make Fine Fashion
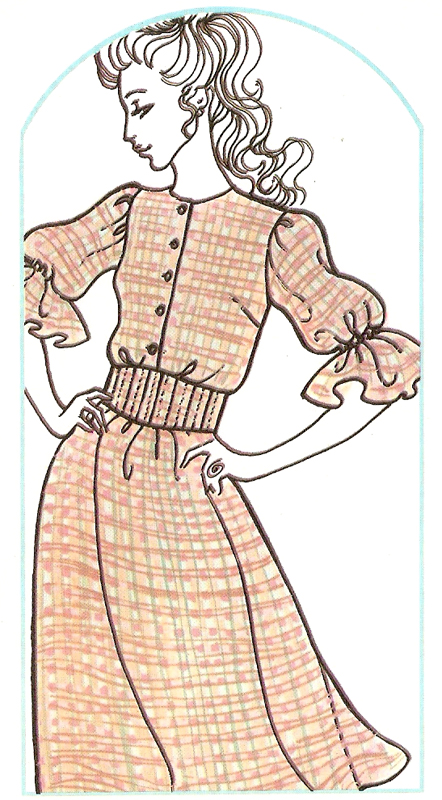
According to an article in an edition of Golden Hands magazine from 1971, ‘Fine Tucks Make Fine Fashion’, and who am I to disagree?! Especially when confronted with evidence as convincing as these fantastic illustrations. The article suggests that tucking ‘gives a well thought out, expensive looking finish to any garment, and lends itsef particularly well to simple, easy to make patterns, transforming the design into something special’. The article goes on to offer advice on how to prepare and include tucking details when constructing a dress pattern at home.
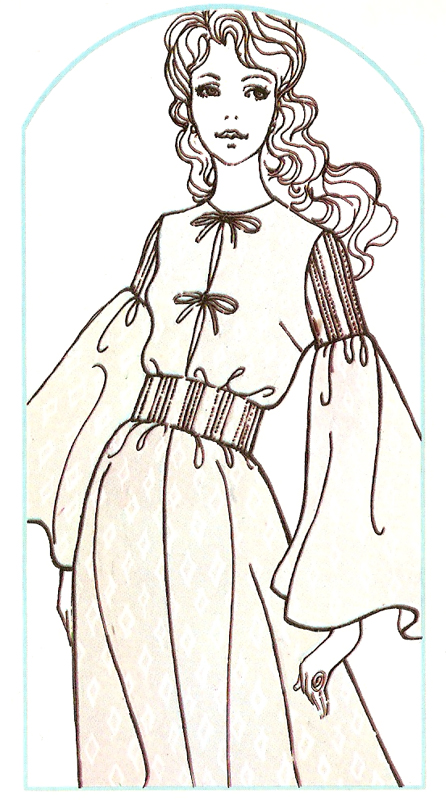
The illustrations are actually interpretations of Vogue and Butterick patterns available in 1971, into which Golden Hands have shown how tucked panels can be applied. Personally, I love how tucks can bring added interest to a plain fabric garment, but also how fun it can be to add tucks to a bold print fabric resulting in an abstraction of the print design.
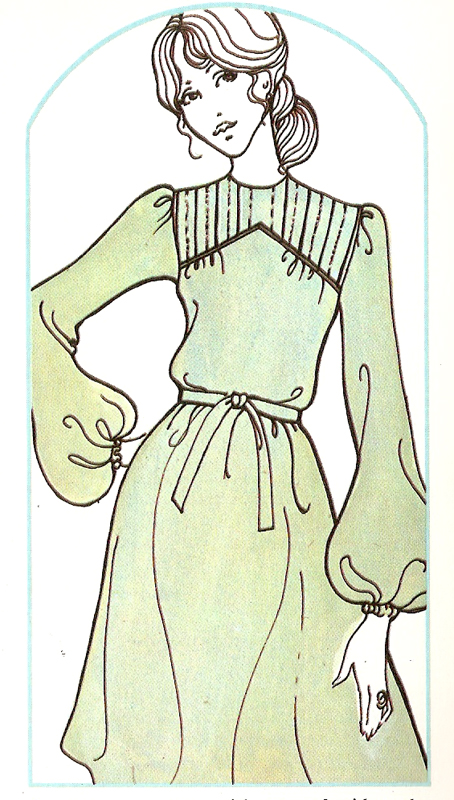
Tucks are made with the grain line, and tucking on the bias grain is almost impossible (which I can attest to, by finding out the hard way!). It is also important to choose a fabric that is easy to press and will form a sharp crease line. The width of the tucks you make is related to the fabric which is being tucked. Any width of tucks may be used for fine fabrics but it is advised to be careful with heavier fabrics, they may only be suitable for wider tucks. Fine tucking should only be applied to short runs such as on bodices, yokes, sleeves or insets. For longer lengths, such as on the length of dress fronts and backs, use wider tucking.
When deciding on the width of your tucks, it is a good idea to test on a scrap of your fabric by making several rows of tucking in different widths. Press the tucking and then decide which is most suitable. Tucks must not interfere with the fitting of a garment, so mark out the darts and end the rows of tucking before you get to any darts.

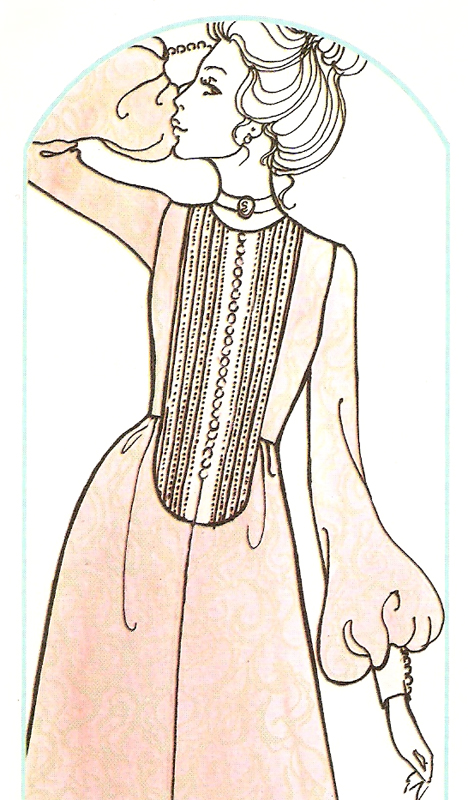
While considering the area and depth of the tucking you must also decide on the distance between the tucks. Once again, it is a good idea to test different widths on a scrap of fabric. Tucks can be evenly spaced, grouped in two or threes or more, or created ‘flush’ with no visible once pressed. For evenly spaced tucks, start making them the same distance apart as they are deep. Press them and if they appear too wide apart try creating them closer together. However, be warned that of they are too close together they will not lie flat after pressing and will tend to lift a little. Happy tucking!
Comments
Sara
March 30, 2010 #
What a great vintage resource! Do you have to sew the tucks down?
Zoe
March 30, 2010 #
Hi Sara, no you don’t need to stitch them down, just carefully press them flat, although you could stitch them along the edge if that was the look you wanted.
ruth
March 30, 2010 #
I love golden hands magazines and have a large collection now! They are brilliant resource, I haven used pin tucks in a long time – the pictures have given me an idea.
Becky
March 31, 2010 #
I love tuck details. My first dress project was tucked all up the front like the bottom blouse picture. That was one of those projects I was glad I didn’t over think before I jumped in.
Serendipity Handmade
March 31, 2010 #
Pin tucks are one of my favorite details! And I love these illustrations. They seem so familiar…I’ll have to go dig out my copies of Golden Hands now.
Camelia Crinoline
April 1, 2010 #
Perfect timing, I just bought a pattern that has a pin tucked bodice. Thanks for the tips.