
 Sign In

How to Sew a Centered Zipper
I think everyone remembers their first zipper. Zippers are intimidating, but mastering them opens up a whole new world of sewing possibilities. I am always surprised to find out how many accomplished seamstresses have never installed a centered coil zipper. I get it, invisible zippers have tons of appeal, but there is something about a centered zipper that is so satisfying to sew.
Our latest pattern, debuting December 8th, features vintage details, including a centered zipper. So there is no better time than now to brush up on this classic closure.
Prep
Like all finishes and details, inserting the perfect centered zipper starts with preparation.
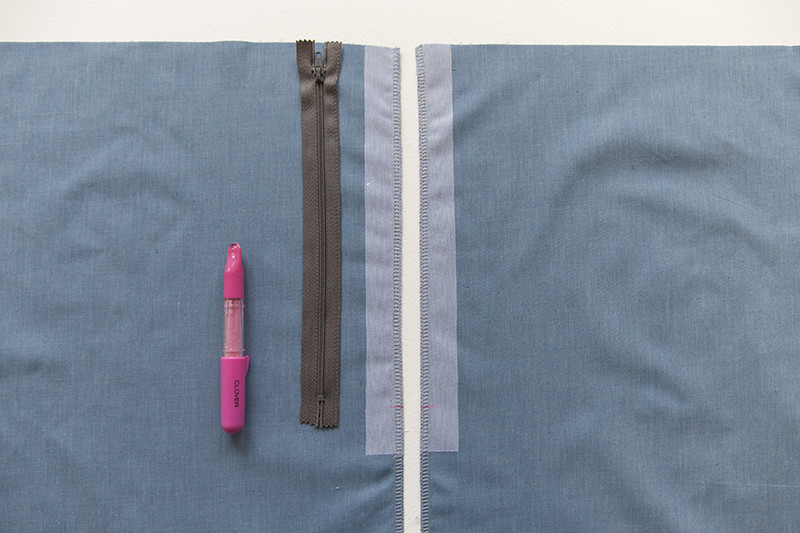
1) Cut two strips of knit interfacing along the direction of least stretch. The strips should be the length of your zipper plus 1″ by 1″ in width.
2) Apply the interfacing to to the wrong side of the zipper area.
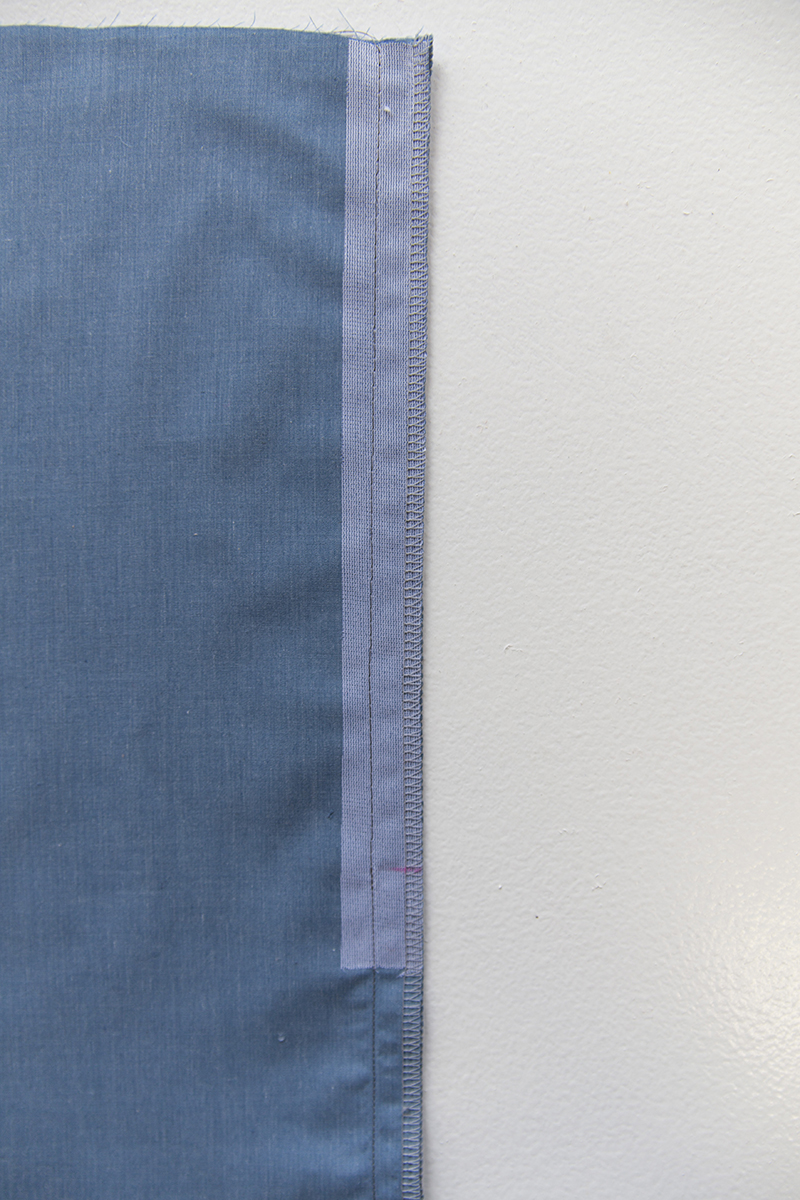
3) Finish the seam allowance of the zipper area using your preferred seam finish.
4) On the wrong side of the seam allowance, make a mark right below where the zipper stop will be.
Create the Foundation
1) Pin the garment right sides together at the seam where the zipper is being installed.
2) Set your machine to a basting stitch.
3) Starting at the top of the garment, stitch towards the hem using a basting stitch.
4) When you reach the zipper stop mark, rotate the hand wheel of your sewing machine until the needle is in the down position. Readjust your machine setting to a standard straight stitch. Backstitch below the zipper stop mark to secure the stitch, and continue sewing towards the hem of the garment.
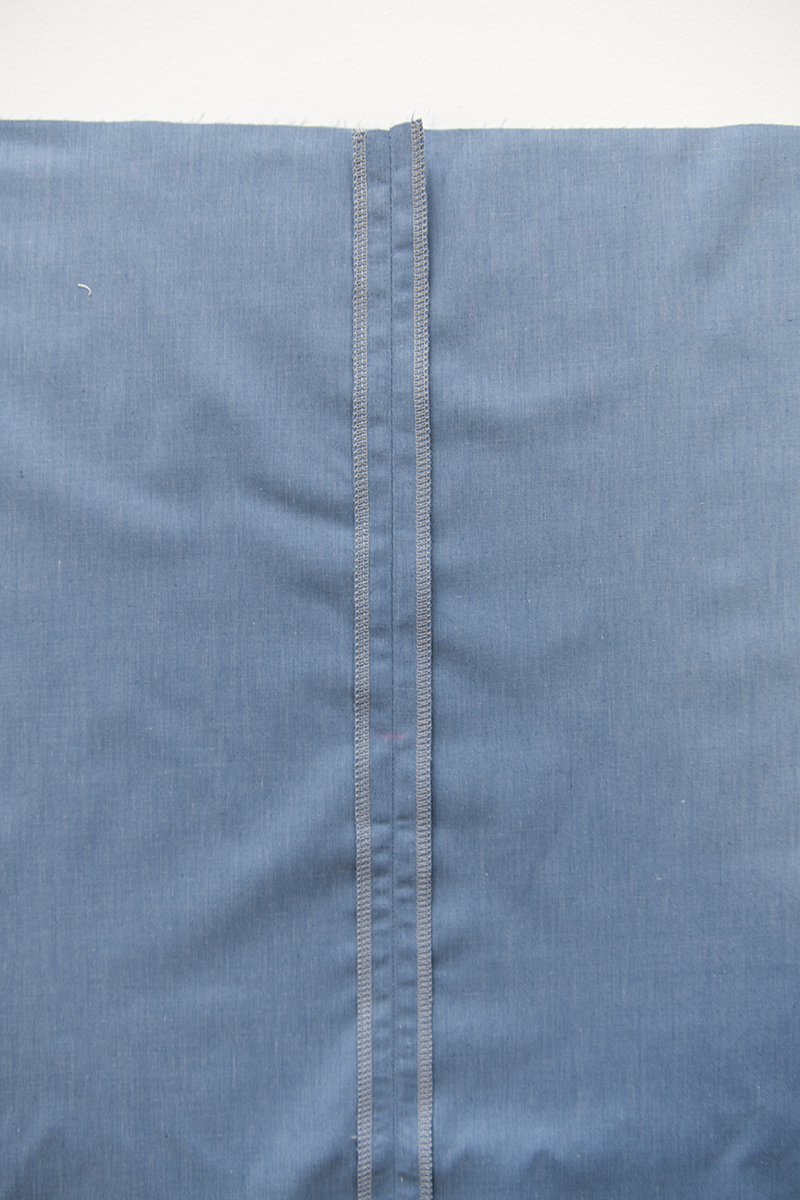
5) Press the seam open, and transfer the zipper stop mark to the visible part of the seam allowance.
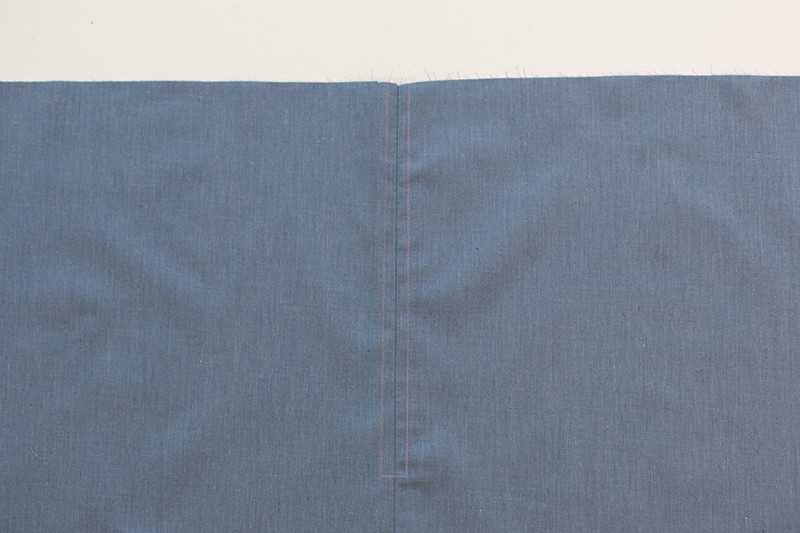
6) On the right side of the zipper seam use a clear ruler and a water soluble marking tool to mark your stitch lines. This will consist of 3 lines in total. The first two will be 1/4″ away from each side of the seam and parallel to it. The third will be perpendicular to the first two lines at the zipper stop mark.
Baste
1) Place zipper along the basted portion of the seam, aligning the the teeth so they are centered with the seam and the zipper stopper is just above the zipper stop mark. Pin into place.
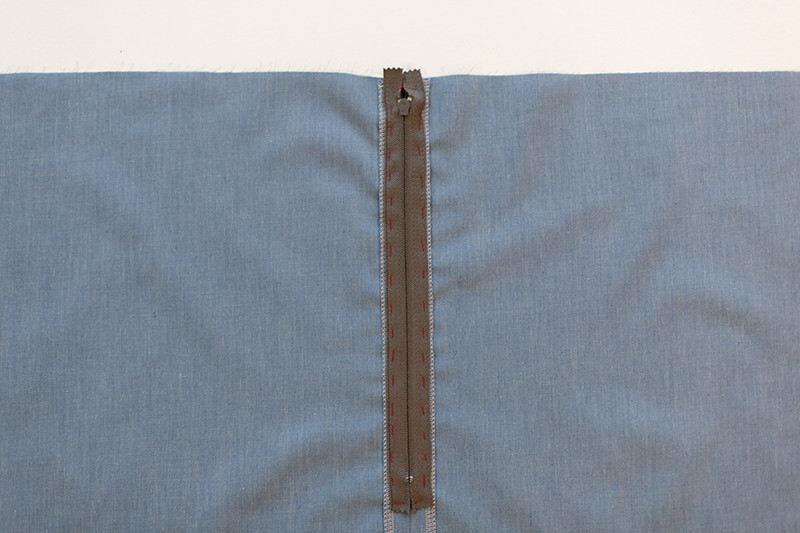
2) Using a hand sewing needle, baste the zipper in place.
Install the Zipper
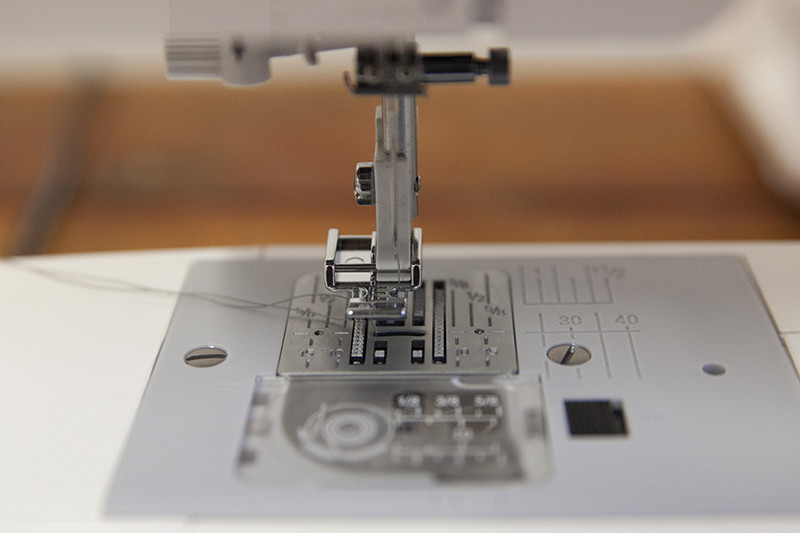
1) Attach the standard zipper foot to the sewing machine. On most domestic models, this foot has two sides. Secure the ankle of the machine to the right side of the foot. Adjust your needle placement so that it is in the right most position.
2) Beginning on the left side of the zipper with the right side up, sew from the top of the zipper along the guideline drawn earlier toward the bottom of the zipper. Pivot at the bottom corner sewing toward the second corner, pivot again at the second corner and continue sewing until you reach the top of the zipper.
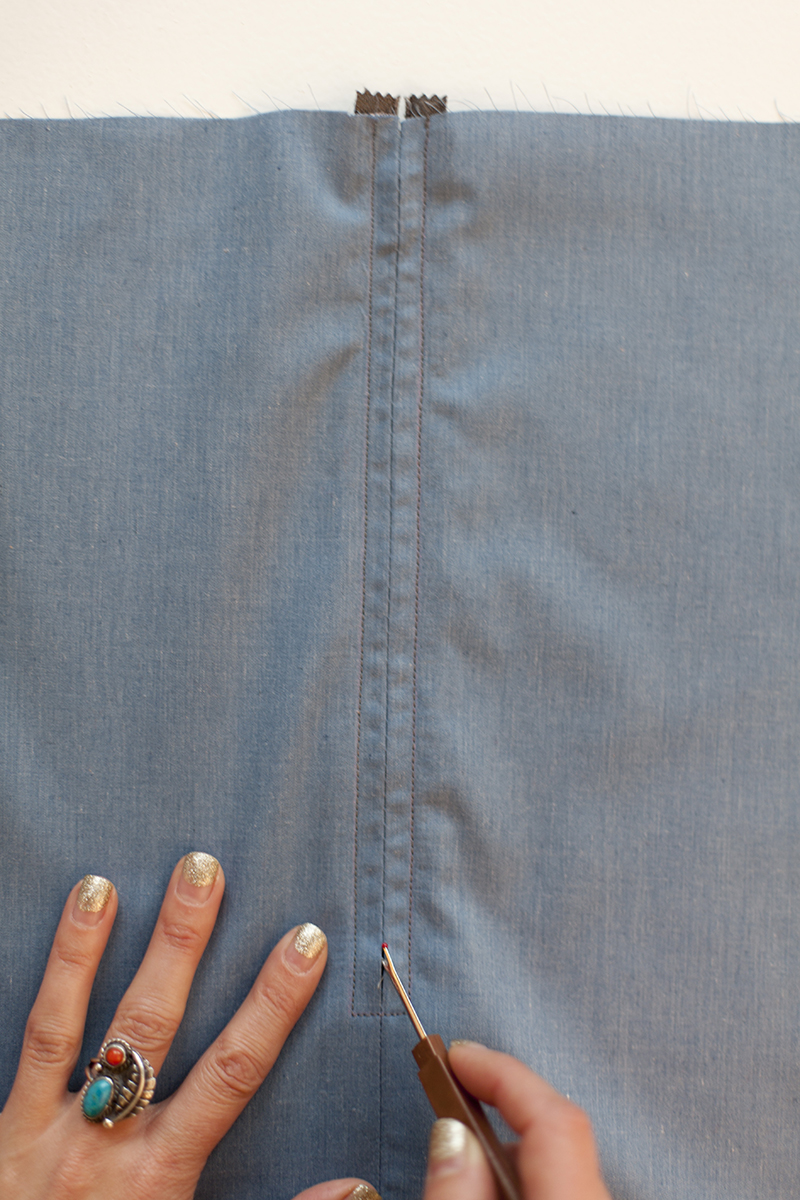
3) Carefully use the seam ripper to remove all hand and machine basting. Remove any stray threads, and press.
There you have it, a gorgeous centered zipper!
Do you remember the first time you installed a zipper? Was a triumph or a nightmare? Share your stories below!
Comments
Kira Bee
December 1, 2015 #
Thank you for this! I’m actually almost finished with a dress but for the zipper, and I was going to poke around for better installation technique — I’m terrible at zippers — I think this will really help!
Peta Louise
December 1, 2015 #
Great tips, thank you. And I’m looking forward to seeing the new pattern!
Becky
December 1, 2015 #
Waking up to the new issue of Seamwork with two lovely new patterns, a copy of the Seamwork Annual on it’s way to me – along with a super-discounted Colette pattern (!), a wonderful tip in Snippets today that I will use for making stocking-stuffers, AND a new pattern coming out in a week!!!
You all have given me so much that I feel like I had Christmas morning early. Thank you!
Debera Massahos
December 1, 2015 #
In lieu of hand basting, Dritz Wonder Tape works really slick! I love hand sewing/basting but find that if I tape the zipper down it refuses to wiggle at all. Wonder tape doesn’t require heat to affix and it’s water soluble so the first washing makes it all disappear. It’s a nice compromise if pressed for time or for those who prefer to minimize hand work.
Iris
December 1, 2015 #
Oh, I so want to rip out the invisible zipper in a canvas skirt I threw in the “maybe later” pile and put in a regular zip that doesn’t get caught in the fabric. Maybe I will sit down with this post, take a deep breath and try it…
Pelly
December 2, 2015 #
I learned to do zips this way in Home Ec at high school, and I *can* do it, but I hate it. I hand-pick all my zips these days, and although it takes longer I find I have much more control doing it by hand. It’s sturdy, too – a year ago I made a Ginger in heavy denim; it gets worn a few times a week, and the zip is as good as the day it was installed.
Haley
December 2, 2015 #
I adore a hand picked zipper, it is such a lovely technique!
Robin
December 2, 2015 #
The installation in the photos looks great but…where is the zipper pull? This has always been my bugaboo when doing this type of zip installation, getting around the lump created by the zip pull. It’s not easy to work around, and I was hoping before I read the post that this challenge would be addressed, so it would be great if you could maybe offer a few hints. Lately I have had some success stitching partway up one side, then moving the pull to the other side of the foot, but to do this well you have to remove the basting, and that takes away from a stable foundation for the top stitching. No rush though – I have only been frustrated by this for 35 years, having only recently discovered and invested in a hidden zipper foot! ?
This is what I love most about sewing – always room to improve, and learn something new!
Robin
December 2, 2015 #
I see now, you left the pull at the top, and it doesn’t appear to have prevented much of a lump. I think my problem has been I try to make the top stitching too close to the zipper, as in less than 1/4 inch, probably in an attempt to get a minimalist look which is better achieved with a hidden zip installation. Funny, I never thought of this style as vintage, but then I guess I am showing my age. When I was in my teens and twenties, I collected vintage clothes, but my version of vintage was the mid-1800s through the 1920s, prior to the zipper’s widespread use.
Robin
December 2, 2015 #
‘Prevented’ should have been ‘presented’
Haley
December 2, 2015 #
Hi Robin! I like to draw my guidelines in at 1/4″, then stitch just to the outside of the mark. This additional 1/16″ really helps to navigate around the zipper pull.
My vintage collection has always been focused on the 1940s- 1960s, so when I see a centered or lapped zipper I am reminded of my favorite vintage pieces. I absolutely love that the word vintage brings to mind something different from person to person. Your collection sounds lovely!
Georgia
December 2, 2015 #
That’s where the zipper foot comes into play. My machine has one I can flip flop between sides so it doesn’t have anything over the teeth and helps drag fabric through the feed dogs on one side only.
Carley
December 2, 2015 #
Hi Robin,
Here is how I get around the zipper pull problem. I always start at the bottom, sew across the base with no back tack, then pivot and sew to the top. I unpick just a few of the basting stitches right where the pull is, and as I’m sewing up to the top I stop with the needle in the fabric and raise the presser foot. I then put my finger under the fabric on the tab of the zipper and just push it backwards until I can put the presser foot back down without hitting it again. Then I sew up to the top without a bloop out!
I then switch sides with my zipper foot, start back at the bottom again and stitch across the previous stitches at the base of the zipper (no back tack, the double stitching is the reinforcement) and then pivot and sew to the top again, stopping as before and pushing the pull back so I can do a smooth stitch to the top.
Kevin
December 4, 2015 #
And, Thank you too. Good addition to a valuable tutorial.
Emme
December 2, 2015 #
I took a wonderful class at the POrtland Sewing school, where the best trick i learned was to use 1/2″ scotch tape centered over the seam, so you don’t have to draw your box, you just use the tape as your guide lines. I’m so grateful i took that class.
Carley
December 2, 2015 #
Thank you for the wonderful tutorial on installing a centred zipper!
I am so glad to see you recommending hand basting it in place before sewing. This is what I learned in high school, many years ago, and it is still, in my opinion, the best way to do it. I have tried all those ways of sewing to the seam allowance first, or taping it in place but those methods are not as successful. I find you really need to hand baste to hold all three layers together properly. (body, seam allowance, zipper tape)
The only thing I do differently is I sew directionally bottom to top on both sides. I start by sewing over the base, pivot and sew to the top. Then I switch sides with my zipper foot and stitch over the stitches at the base, pivot and go up the other side. I stop just before the zipper pull and lift the presser foot and wiggle the pull backwards out of the way so I can complete the line of stitching without having a bloop out around the tab.
ALSO I have actually read instructions in a sewing magazine saying to stitch close to the zipper teeth!! NO, it has to be 1/4 inch away from the seamline! Sheesh!
Thanks again!!
Haley
December 2, 2015 #
I agree regarding hand basting. Wonder Tape or other similar products work in a pinch, but nothing controls all the layers quite like hand basting.
Working from the bottom up when installing a zipper would be especially helpful if the seam is curved or on the bias. Great tip!
nothylane
December 2, 2015 #
I’m so looking forward to another new pattern! Keep em coming!
Francesca a
December 2, 2015 #
Great tutorial, thank you! And new pattern – yay! I really liked the latest Seamwork patterns too, thank you:).
I’ve been trawling the net and I winder if you can help. I’m cutting a Moneta in lightweight merino – come to think of it, I might change my mind and cut a Wren bodice as I haven’t tried it yet – and want a full circle skirt. My fabric’s very wide so I can actually cut it totally seamless. It has no lengthwise stretch but quite good widthwise stretch. Would side seams add stability? Please say no so I can have it seamless:) – just kidding…..
Haley
December 2, 2015 #
Hi Francesca, I actually think that adding side seams might cause more trouble than good, as the seam may stretch when sewing. I would cut the skirt as one piece, then let the skirt hang overnight before hemming. If anything stretches you can trim before hemming.
Francesca a
December 2, 2015 #
Kind Haley, thank you for replying to this totally non relevant question:)
Rosey
December 2, 2015 #
Wow! That’s the very same method mum taught me, at age 10, to install my first zipper. Go mum!
(We never had an invisible zipper foot.)
Haley
December 2, 2015 #
She taught you well! Good job mum!
Jo-Ann
December 3, 2015 #
I love centred zippers and have not got the hang of invisible ones yet. I do hand picked ones and machine stitched ones and have never had any trouble with them! (A bit boastful sounding but it’s true!) Zips like me! Preparation is key and of course a good zipper foot.
Kevin
December 4, 2015 #
Very good. I have always had project that needed a zipper and never quite got them done because if it. If I can apply this to waxed canvas projects I am very pleased.
I was never afraid and it always made sense, I just never did it.
Now, I will go learn from the invisible zipper too.