Simple tips for photographing your projects

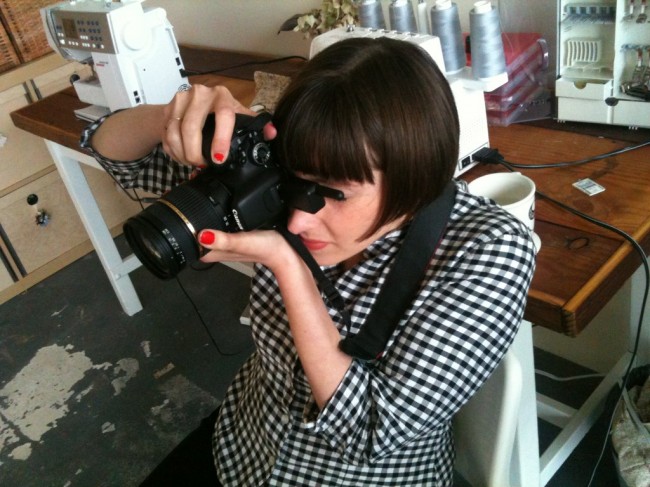
{above image: taking photos of the new upcoming patterns last week! Photo by Caitlin with her phone}
I’ve been getting some questions here and there lately about taking nicer photos of the garments you make, be they for your blog, Flickr, or just to share with family and friends.
I think my photography skills have gotten better over the years, and I’ve learned a lot from some of the very talented photographers and prop stylists I’ve been lucky enough to work with. I am by no means an expert, but I love photography and take a lot of photos of clothing and sewing, so I’m sure I have a few tips that could be relevant.
First of all, I’m not going to talk about specific camera equipment. That would bore most of you, I’m sure, though I’m happy to discuss it in the comments if you guys want. In any case, I think there are more important things than the type of camera or lens you use, things you can do without buying much of anything. So, in order of importance:
Lighting

I believe lighting to be the single most important factor in getting a good photo, but particularly if you’re shooting clothing. A few tips:
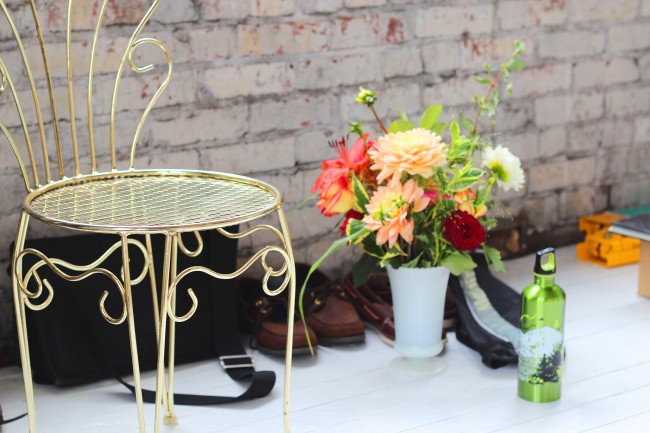
- Natural lighting is usually best. Assuming you don’t have a fancy-pants studio light set up, natural light is going to be your best friend. Try to make use of it whenever you can. On-camera flash can do in a pinch, but it will rarely give you the flattering, soft light you want, so I’d use it as a last resort. All the photos in this post were taken with 100% natural lighting. Though we now have a more fancy-pants studio lighting set up as well, I still think natural light is incredibly versatile and will continue to use it along with other lights.
- Use filtered light. Have you ever tried taking a photo of an outfit outdoors only to see ugly, harsh shadows all over your face and body? If you take photos in direct sunlight, particularly when the sun is right overhead, you’re going to get this kind of hard light with strong, contrasting shadows. Not ideal or flattering. If you have to take photos mid-day on a sunny day, look for a shady spot with filtered light.
- Late afternoon/early evening light is awesome. A favorite time for photographers shooting people outdoors is an hour before sunset. The light is soft and hits at just the right angle at this time of day. Check the local weather report for the time of sunset and try taking photos one hour prior to that.
- Face toward the light. This might seem obvious, but be sure to tilt your body toward the light source (the sun, if you’re using mostly natural light). This will also help eliminate harsh shadows, especially unflattering on your face.
Taking the photos
- Grab a friend (or substitute). Have a friend or family member help you with the photos. If they’re too busy or whine or roll their eyes, you may want to learn to use the self-timer on your camera or pick up a wireless remote (if your camera works with them). If you have trouble standing your camera up, check out the gorillapod! I have one of these, and it’s fun. It’s inexpensive and flexible, so you can position it anywhere, and even wrap it around tree branches, door handles, you name it!
- Take plenty of shots. I often say that I take the shotgun approach to photography. Maybe this is because I tend to close my eyes and / or make stupid faces in photos, but I like to have a whole lot to choose from. Move around and try different positions and poses. Try a variety of angles.
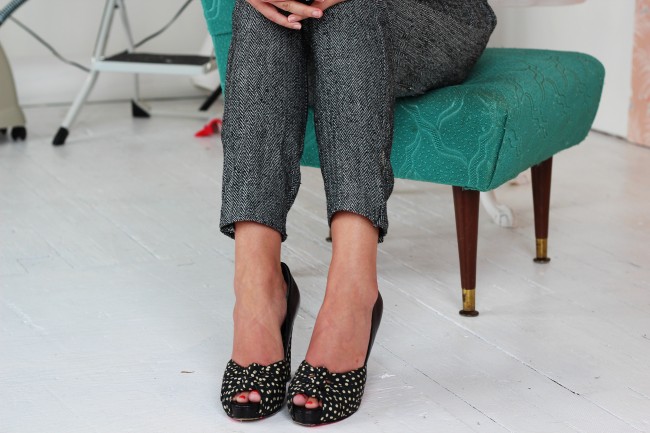
- Mix in some detail shots. When I photograph sewing projects, I like to mix in detail shots with full-length shots. I think it helps tell the story of the garment better and it’s more visually interesting.
- Consider your “set.” Take a look at what’s in the background of your photo. Things like cords and wires may not seem obvious in real life, but they can be distracting in photos. Or if you’re outdoors, you might not want to have a busy background if it distracts from the subject (that’s you and your garment).

Editing the photos
- Pick the best. Once you’ve taken a bunch of photos, it’s time to choose your favorites. This can be time consuming, and every photographer has their own workflow. I like to give all the photos a quick once-through and choose my favorites quickly. I then narrow it down from the smaller batch.
- A little Photoshop goes a long way. There’s nothing wrong with doing a little photo editing. I almost always have to crop my photos and adjust the colors to bring them closer to reality. You might also need to brighten or darken your photos. Photo editing software can help you with all of this. You don’t need to master it to do these simple things.

 Sign In

Comments
Amélie
March 28, 2012 #
Thank you so much for the tips!! This article was really interesting!
I love your blog!!
Francesca
March 28, 2012 #
Hi Sarai
I’m new to photography and I’m working on how to take better photos and these tips are fantastic! Do you have any tips for when you’re the other side of the camera? I always look ridiculously awkward in the photos. Have you got any tricks for natural poses? Thanks xxx
Sarai
March 28, 2012 #
I find it helpful to interact with the person taking the photos, just speaking to them normally, making jokes, etc. Of course, you get a fair amount of mid-sentence weird captures that way, but you also feel more natural just acting normal.
One thing I’ve noticed from the real models I’ve worked with is how similar modeling is to acting. It’s really difficult to “act natural” in front of a camera, not to mention other people. It looks so easy after the fact, but it takes quite a bit of confidence! I think spending a lot of time in front of the camera really helps, so the more you do it, the more natural it feels.
Francesca
April 2, 2012 #
Thank you for that advice. I mostly try to get people I’m comfortable with to take photos, so I guess it’s one of those things where there’s no magic wand, just have to practice… and take a lot of photos! xx
Mariló
March 28, 2012 #
I would love to make beautiful photos for my blog. I’m trying to get confidence in front of the camera but I also needed this kind of tips. Thank you! I can’t wait to try them!
Lavender
March 28, 2012 #
Great tips, Sarai! For anyone who wants to be enveloped in the beauty of Magic Hour, run out and rent Days of Heaven by Terrence Malick :)
Andrea
March 28, 2012 #
I always find that I get better results when I’m not zoomed in to my subject as well- better to crop the photo later than use a super zoomed setting.
Also, Sarai, how about a pattern for your gingham shirt? Looks beautiful!
Sarai
March 28, 2012 #
Isn’t it cute? It’s 100% silk too… one of my favorite thrift scores!
Seraphinalina
March 28, 2012 #
Thanks for the tips. Photography has never been an area of interest for me. I’m happy to be in pictures, not so interested in taking them. But now that I’m the primary photographer with a timer for my blog, it’s something for me to learn about.
colleen
March 28, 2012 #
Good, okay, great tips. But, here’s the real question….When are the new patterns out??????
Tracy
March 28, 2012 #
I know right?? If you look through Sarai’s picture of her vacation on Twitter it looks like she is wearing some….like this white dress:
http://www.flickr.com/photos/saraicat/6691569515/in/photostream
She didn’t show it to us before she went away, its got pockets…..could it be one of the new patterns?
colleen
March 28, 2012 #
oooooohhhhh. Square neckline? Pockets? Looks adorable! Thank you, super sleuth!
Sarai
March 28, 2012 #
Hahaha! We are just waiting on an ETA from our bindery. Really, it shouldn’t be long now!
colleen
March 28, 2012 #
Woot woot!
veronica
March 28, 2012 #
thanks for the tips! My friends and family are too busy to help out so I’m going to look into this remote you mention! Might be my lifesaver!
Juli
March 28, 2012 #
These are great tips! I know that I personally always love to see close up shots of the things that people have sewn when they write a blog post and I try and do the same. Details of stitching, buttons, etc. are always fun to see! :-)
Rachel W.
March 28, 2012 #
Ah, thank you– these are great tips! “Take better photographs” is one of my goals this year: I’m even getting brave enough to take some of my project photos outside (heavens!).
Do you (or any of your helpers) normally tote around a tripod, Sarai, or do y’all just have amazingly steady hands? I’m trying to learn to use my tripod, and I can’t figure out what height the camera should be– too low and the pictures make me look absurdly tall, too high and I look like a hobbit. Jeez.
Sarai
March 28, 2012 #
I don’t use a tripod much, but sometimes I do. We are blessed with a lot of light in the studio, so I can usually have a fast enough shutter speed to hold the camera. But low light requires steady hands or a tripod or flat surface.
As for height, I think waist height is generally considered most flattering. When I take full length photos of someone, I’ll often crouch, get on my knees, or sit in a chair like in the first picture above.
Amanda
March 28, 2012 #
Thank you for these tips! I’ve been struggling with this cause the lighting in our apartment is TERRIBLE for photographing clothing, but the flash gives terrible haggard shadows and makes me look a nightmare LOL…. and on top of that, my hunnie is still learning to use the camera LOL. This should help out immensely – thanks!! :D
Emily
March 28, 2012 #
Great tips (and tips in the comments section)!!!
Jess
March 28, 2012 #
Yay, this is so timely for me as I just started a blog :) I especially like your tip about detail photos, I’ve always enjoyed them in your posts but never thought to do them myself.
Chie
March 28, 2012 #
Hi! These are great tips! I wonder if gorillapod works with SLR? I have Nikon D5000, and I wasn’t sure if the the tripod bears the weight of the SLR. Any thoughts?
Sarai
March 28, 2012 #
It does, but it depends a bit on the lens. Mine holds up just fine with a lightweight fixed lens on it, but bigger, heavier zoom lenses cause it to topple.
StephC
March 29, 2012 #
Great tips.. We favor just before dusk, too.. I’m pretty pale and find it works the best for my skintone…
Nikki
March 29, 2012 #
This is really helpful. Great tips. Another blogger gave us brilliant tips last November, I think it was Handmade by Carolyn. I’m hoping that with her tips combined with yours I may actually manage to get some decent shots! I think I feel a bit daft if I take loads of photos, even though when I go away I take hundreds!
Lies
March 29, 2012 #
Thanks for the tips! I still have a long way to go, but I have found that GIMP is a pretty good tool to optimize colours. For those who don’t want to invest in Photoshop :-)
N Colleen Sexton
March 29, 2012 #
Thank you for your great suggestions! I always feel that my photography skills don’t measure up to my sewing skills so your article is very helpful. Best wishes, Colleen
Beth Huntington
March 30, 2012 #
I really appreciate your photography tips! I just joined the blogging community with my refashion adventures on http://www.chicenvelopements.wordpress.com and I’m awestruck at all the talented people out there willing to share their expertise!
maddie
March 30, 2012 #
This is great Sarai! For the longest time, I had a hard time photographing my projects as my apartment only has one window, meaning very, very little sunlight. But I found increasing the ISO and adjusting the color really helped my photographs look like they had been taken in natural light.
onelmon
April 2, 2012 #
Very helpful tips. I love documenting works and events but I am having a hard time in taking good photographs. These will surely be a good learning. Thank you very much for sharing. :D
Nancy York
April 10, 2012 #
Thanks for the tips I need any help I can get. Wind is a problem here outside. I always struggle getting the photos with my husband helping who is no photographer but he tried to please me. I’m not a good poser either. I like your tip about including close ups to add interest. Nan
Darlene
April 11, 2012 #
Thanks for the great tips in this article. as you can see from my blog, I REALLY need help with my pictures! I do try, but still not good enough….
hadia
April 17, 2012 #
great advice…I am working on my cooking photos ..thanks for sharing your valuable information
Sarah
June 9, 2014 #
My tip would be to watch the angle.
If you have someone taller than you take your photo, they will be “looking down” at you. This will distort the angle – your head will look big and your legs tiny.
If you have someone shorter than you take your photo, they will be “looking up your nose” – showing too much under your chin and distorting the proportions.
So if you and your photographer have a height differential, then use steps or other props to get near each other’s height.
Of course, experienced photographers break this rule all the time. But you need to learn the rules before you break them :-)